Pages

Showing posts with label DIY. Show all posts

December 14, 2014

ticket book

 
     I am a collector of things; stuff like blue china, scrapbooking paper, books, etc., fills up a huge amount of space in my room. But there is one collection of items which occupies only a small corner of my desk. It is a bundle of ticket stubs from various places and events I've been to over the past few years. Whether it was a movie night with friends, or a visit to Dante's house in Italy, I kept the tickets with some vague idea in mind to display them.
     And so I created a 'ticket book' purely for the purpose of storing away the memories. Kinda cute isn't it? :) Every ticket has a story behind it -- a series of memories from times spent with the most important people in my life. Someday, when I'm an old lady, I'll flip through them and smile at the wonderful experiences I had 'back in the day'.      

September 19, 2014

sugar and spice and all things nice

So I was trying to improve my blog labels and accidentally deleted my previous post on tea and hot chocolate. *face palm* I'm not going to write it all out again (sorry!), but I will include the pictures and directions once more.


1 cup tea (I used pumpkin spice tea which blended nicely with the hot chocolate, but be adventurous and try your own flavor!)
1 cup hot chocolate
The book New England Wilderness


Fill your mug 3/4 of the way full with hot chocolate and top it off with tea.
I suggest you drink it over the book "New England Wilderness" to satisfy your desire to travel; there are lots of detailed descriptions and beautiful photos of the rugged northeastern landscape.


Happy Autumn and Enjoy!

August 11, 2014

mason jars and barnwood

      A couple of months ago, my sister Elissa got their old barn pulled down. I was greedy (as I sometimes am) and asked for some pieces of barn wood. Of course I asked with good intentions of doing something wonderful with it, but instead the wood sat in our garage for quite some time. Just recently I stumbled across this picture and spontaneously decided to try something like it. It was easy to figure out, and because Dad helped me with all the manly stuff (like drilling) my lovely project was finished quickly.

      Here is the end result-- with some summery yellow flowers from our garden.


March 17, 2014

repurposed.

While I haven’t been writing on my blog that much, I have been doing pretty fantastic things in my spare time. Like going to the contemporary ballet, playing for piano competitions, and dancing my feet off at the Spring Breakdown. (If you’ve never been contra dancing, then you’re missing out on a huge part of life!)
Most recently I completed this décor piece—an idea I got from pinterest.
When the opportunity arose to get some piano keys, I greedily snatched them up and promptly set to work. They were off an old upright that was made somewhere around 100 years ago—worn and yellowed with age and use. Their antiquity made them even more visually appealing (to my advantage.)


I used a coping saw to cut off the long wooden ‘arms’, sanded the ends, and lined them up in order. Fitting the keys together was like putting puzzle pieces in the right places—I had to number all 88 of them to keep them straight.
 

Lo and behold we had a useless board lying around that was the perfect size. Not only that--we also happened to have some black spray paint from leftover projects! Things like that need to happen to me more often…. It was a slow and painstaking process to line up the keys in order, place them in a straight line and glue them solidly to the board.
 

Finished product! It’s a quaint little wall piece (if I do say so myself.) I may have found an entrepreneurial opportunity as these things are selling for a pretty penny online. If you have any old pianos that aren’t serving any purpose----you now know where to send the keys! ;) 


January 6, 2014

homemade notebook

     This craft should have been a part of my Christmas blog series, but I had to wait until after the holiday since it was a gift for my friend Catherine.

It is a simple little notebook made with blank paper and a scrabble board. The idea came to me (believe it or not) when we were playing scrabble. Since we happened to have 4 extra scrabble games lying around, (don't ask me why-- as a family we are fairly obsessed with the game) I was able to begin work immediately.

 
note: the game board is too thick to be professionally spiral bound at any office store. Thanks to a Dewalt drill and some binder rings from Wal-Mart I got the job done quite nicely myself. Who needs a fancy spiral-binding-machine?

 
The most difficult part of making this notebook was measuring the dimensions and cutting everything proportionally. It took me a while to decide how large I should make it.  Thankfully scrabble boards already have grids on them to make the job easier:)
 
 
I was quite pleased the result. --Can't wait to make more! Maybe (someday in the future) I will make some with different game boards. Monopoly perhaps? Risk? Sorry? Look out. I'm going to start haunting the thrift stores for more supplies.

December 9, 2013

Homemade Christmas {hot chocolate}


     Though this recipe is already on the world wide web, I just had to share it with you! It makes so much hot chocolate mix that I am going to have to give some away for Christmas. Once again my mason jars will come in handy for that:)


HOT CHOCOLATE:

(Makes 15 cups of mix or 45 servings. I know! That's a lot!)

10 cups dry milk powder
4 3/4 sifted confectioners sugar
1 3/4 cups unsweetened cocoa powder
1 3/4 cups powdered non-dairy creamer (there are different flavors)

and don't forget some small marshmallows, and peppermint sticks:)

Chocolate was discovered in the 16th century when Spanish explorer Cortez brought it to Spain from the Aztecs Indians. The Spanish made it a hot sweetened beverage and guarded their precious drink carefully---  It wasn't until a century later when it began to spread across Europe. That's when chocolate houses started up in England and became extremely popular. Thank you Cortez! :)

Homemade Christmas {ornaments}

Here is your ordinary Christmas bulb--  boring, plain, and unappealing.

 
And here is your new Christmas bulb! -- beautiful, old fashioned-y, and delightful in every way:)

 
NOTE: modge podge is all I used (and a book that I didn't feel bad tearing up. Books make up the majority of our wall insulation, but I couldn't find a single one to tear up. I had to buy a romance that looked badly written:) Anyhoo, modge podge is likely to get all over everything when you use it. I spent several minutes peeling layer after layer of it off my hand when I was done.
 
Christmas bulbs (at Wal-Mart) x4 -- $2.99
Paperback novel -- 25 cents at the thrift store
 
Another pretty Christmas ornament is this button bulb that my sister Clara made. All that is needed is a styrofoam ball, buttons that you'll never use otherwise, and hundreds of sewing pins.
 

We taped a layer of tissue paper underneath the buttons to avoid any foam showing. Also you might want to put the hook in first before you start pinning buttons on (unlike like us. lesson learned.) Then you'll have a ornament that is as cute as a button! haha-- get it?


December 5, 2013

Homemade Christmas {wrapping paper}

 Crafts are beautiful. Admittedly most of my ideas are stolen from other people (Pinterest, craft shows, and blogs are chock full of wonderful DIY projects) but the splendor of crafting is that each and every project is going to be unique. This blog series isn't telling you anything, it is showing you one way of doing things. There's no right or wrong way, so cut loose and let your own creativity flow!
_____________________________________________________________________
 
 Making your own wrapping paper is a simple way of personalizing your gifts not to mention that it's completely free! (That is if you've invested in stamps and ink:)


All you need is a roll of butcher paper/freezer paper (both of which are ridiculously cheap) or better yet, the sides of a paper grocery bag. Just cut out the bottom and use the inside.
 
 
The rest is self explanatory! Clara and I had so much fun coming up with different patterns. She created the spider, alphabet, and Blue Jay themes.


These will certainly add some rusticity to your Christmas tree this year! Also vintage Christmas postcards are extremely easy to find in antique stores this time of year. They will add a nice touch to your home made wrapping paper:)

Homemade Christmas {center pieces}

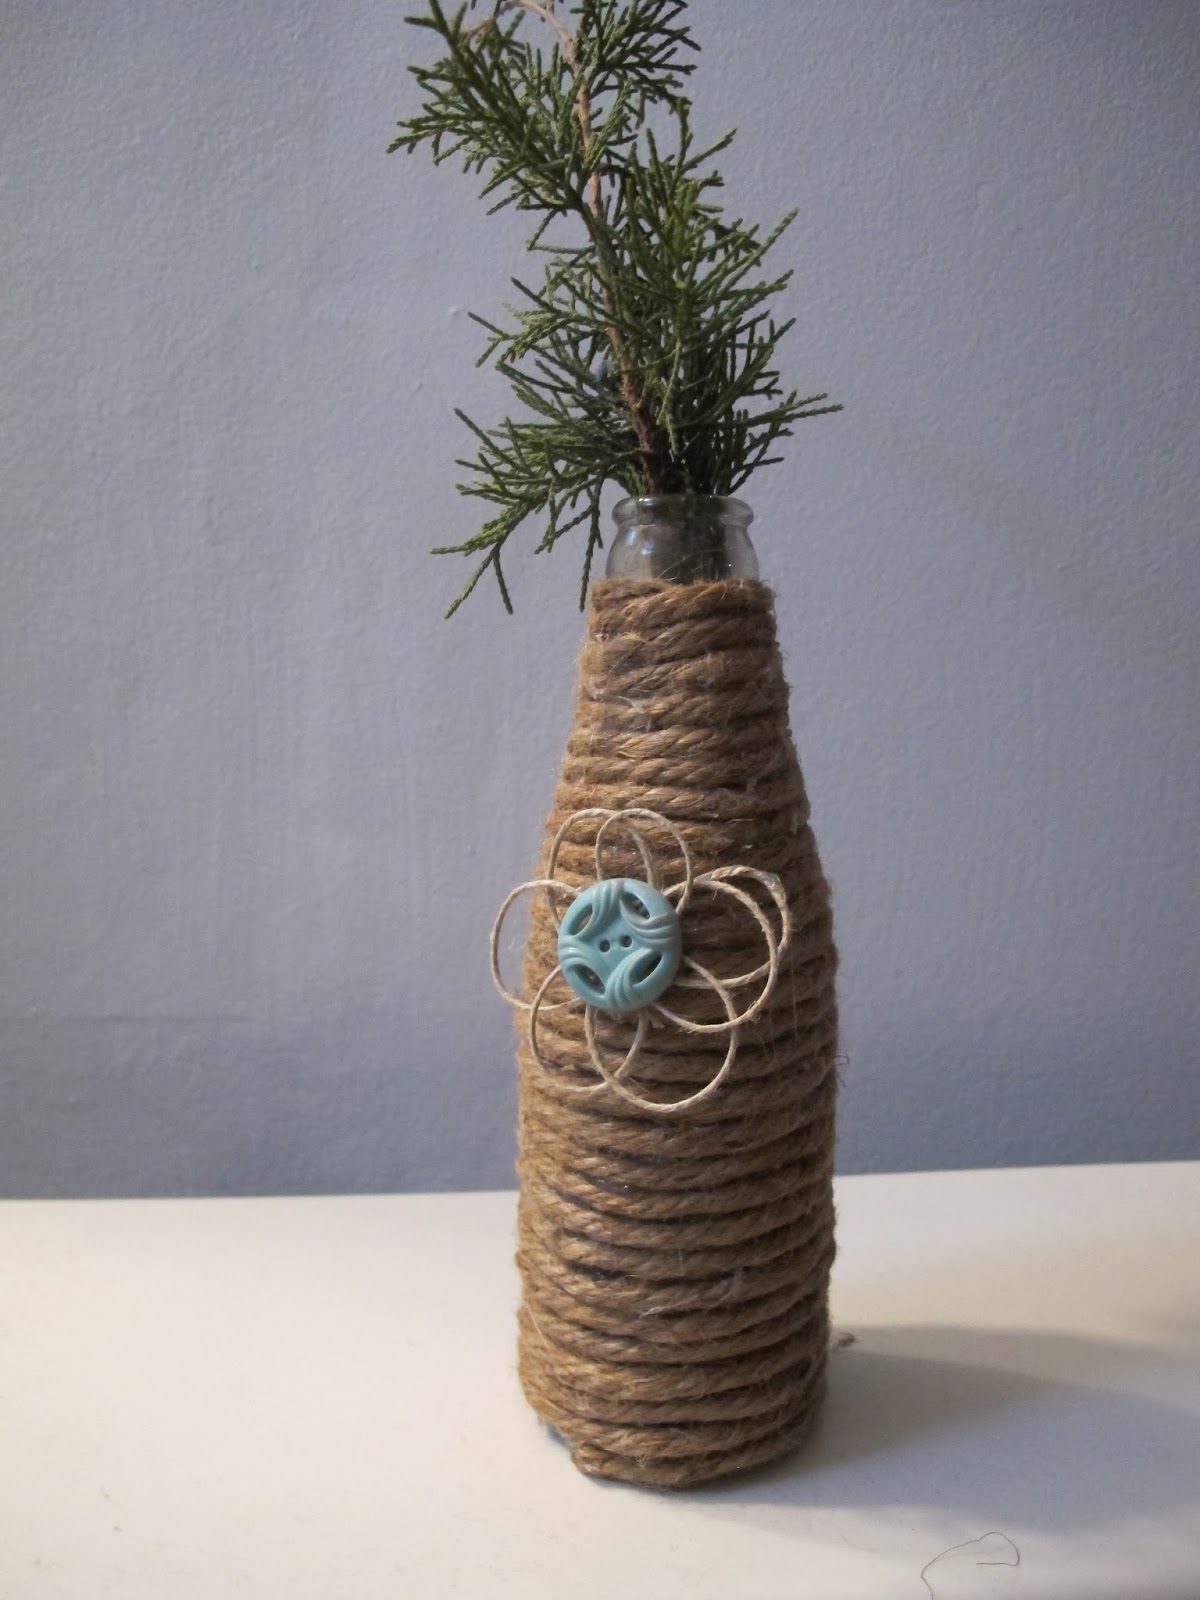
     My inspiration for this bottle is from here-- a blog I discovered thanks to Pinterest. Instead of twine I used macramé which required a huge amount of hot glue. It was worth it:) You can use these bottles for practically anything:) vases, center pieces, decorative wine bottles or to play the 'jug' like Briscoe Darling in Andy Griffith.....

 
Bottle: free (this one was in our woodshed, but you can use wine bottles or coke bottles)
Twine: 3-5 dollars at Hobby Lobby.
Macramé: roughly 10 dollars at most craft stores.
Net price: 15 dollars for enough supplies to make several vases.
 
 
Buttons, burlap flowers, twine braids, or ribbons are simple ways of embellishing your final product. I am still discovering the millions of ways twine and macramé are useful, so you might see some more blog posts about them:) 
 
Mason jar candles-- a common craft project, but one with so many possibilities! I've seen them on Pinterest made with book pages, music sheets, and/or paint.

 
The two I decorated are especially easy to make. A lace doily, some cut up newspaper, a little ric rac and TA DA! My next mason jar experiment is to modge podge fabric onto a couple and see how those come out.

December 15, 2012

a hodgepodge of modpodge

     I am notorious for filling up journals as fast as I can. My motto is that "every detail tells a story" so of course every detail from my daily life goes into the journal.
     Recently, I replaced my old journal with a small black notebook. The solid black was too depressing so I decided to spice it up.
     It was my first venture into the world of Mod-Podge:


 It was a success if I do say so myself....


     My favorite clippings are the words "Use Your Imagination" (thanks to the Western Horseman magazine), the piano keyboard from my American Guild of Organists magazine, and the cross from Cabela's catalog. You'd be surprised to know where I got the rest of these:)
     I will be using a lot of Mod-Podge in the future now. It is a must-have for every crafty person.

June 4, 2012

sewing up a storm

     It's not often that I have the time to lay my hands on a good craft/sewing project, but since today was unofficially a day of rest in our household, I decided to finish some projects and see what I could find to work on. Not that I'm a terribly great seamstress or anything, but sewing is something I like to do, so at least there are good intentions and love (if not craftsmanship) thrown into each undertaking.
Firstly, I found (in my deep dank closet) a baby afghan that I had started for my niece Amelia.
Today I finished it off, though I only hope
that the middle isn't too noticeably bulgy.
The next one will be better I promise!

     Next, I found (in our overflowing fabric box) some quilt blocks left over from a quilt Mom had made many years ago. It was a lot of fun designing the pinwheel design and sewing the blocks together to create a small quilt top. It was quite easy considering that the piecing had already been done for me:)
      And yes, that is my fantastic sewing machine that I won at the sewing expo in Kansas City! It's wonderful to work with, and (with the assistance of a built in touch screen) does small embroidery projects for me.
     My final sewing venture of the morning consisted of nearly finishing a baby quilt for my nephew, Ian. (It's awful hard keeping up with these nieces and nephews:) It really has been a joint project between me and Clara, but today I took the bit in my mouth and worked on it some. I tied the back and the front together, and sewed the binding on (though it still needs a little more work.) It doesn't look half bad, if I do say so myself.


     I especially love the little gangster dogs and cats that we put in it!


      All in all, it was a hard day's work and it was nice to have the feeling of accomplishment. Now, for hemming my brother's pants!